Repairing Plaster Ceiling and Drywall Cracks

Repairing Plaster Ceiling and Drywall Cracks
Patching ceiling cracks is an essential step in prepping a room for fresh painting. Usually a sign of normal settling, shallow cracks seldom indicate problems. Knowing how to patch them correctly, however, can make the difference between a clumsy and a polished paint job. Repair techniques are slightly different for plaster or drywall ceilings, but the results are similar: a smooth, seamless surface that shows your new decor at its best.
Repairing Plaster Ceiling Cracks
Using screwdriver or 5-in-1 tool, scrape loose paint and plaster fragments out of cracks. Enlarge narrow cracks to a width of 1/4 inch, so that they will hold an adequate amount of patching compound.
Sand over cracks with 100-grit sandpaper to smooth the edges of chipped paint areas.
Wipe down or vacuum away all sanding dust.
Spread a layer of patching compound -- either Spackling compound or other plaster-repair compound -- over the cracks with the 1-inch putty knife. Let it dry for four hours minimum and then sand smooth with 200-grit sandpaper.
Spread a second, very thin layer of compound over the cracks and adjoining paint. Patching compound sometimes shrinks when it dries, replacing old cracks with new ones. A second, broader path of compound addresses this problem. Let dry thoroughly.
Sand again with 200-grit paper. Vacuum or wipe away all sanding residue.
Repairing Drywall Ceiling Cracks
Scrape flaking paint and any other loose material from around cracks with the 1-inch putty knife. You do not need to enlarge drywall cracks.
Sand the scraped areas with 100-grit paper.
Cut a strip of paper or fabric tape 1/2 inch longer than the cracks. For a long curving crack, several pieces may provide better, broader coverage than a single strip.
Cover the crack with a thin layer of patching compound or drywall mud, applying it with the 3-inch putty knife and spreading it at least an inch from the crack in all directions.
Press the paper or fabric tape gently into the wet patching compound and smooth out fingerprints with the flat of your hand or the 3-inch putty knife. Let dry thoroughly, for four hours or more.
Sand edges lightly with 200-grit sandpaper and apply a second thin, even coat of compound over the tape. Let it dry thoroughly.
Wipe or vacuum all sanding residue, and get ready to paint.
Business Address:
12 dalebrooke crescent
Freeway Park 1459
Gauteng
Quick Links
Related Articles
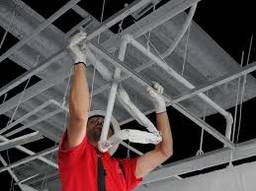
Ceiling Installation
Ceilings add a decorative element to a room. Of course their primary function is to conceal the roof structure or floor above. High ceilings are great at creating a sense of space, but they will generally require the home to be heated more in the winter although they do make the home are cooler in summer!
Read more