Air Conditioning Installation Guide
 Air conditioning installation
Air Conditioning Installation Guide
What you need:
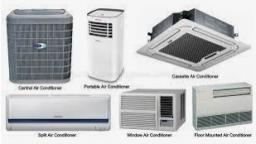
· Air conditioning unit
· Copper pipe
· Water drain pipe
Air conditioning installation should ideally be performed by an experienced professional. However, if you’re comfortable working with HVAC equipment and electricity, it is feasible to do it yourself. Air conditioning installation is time consuming and requires that you follow a number of steps so that the unit works properly and efficiently.
Step 1 - Locating the Indoor Unit
With an indoor air conditioning unit, the positioning of the unit is important for a good air conditioning installation. There should be no pipes around, good air circulation and the unit should not be close to any doorways. For a proper air conditioning installation, furniture should not obscure the front vents of the unit.
Step 2 - The Outdoor Unit
In an outdoor setting, make sure that the unit is shaded from the worst part of the sun. It is made to be weatherproof but some shading from the sun will help it operate more efficiently. The large fan needs to be facing away from the house.
As with indoor units, there needs to be adequate space around the unit. If copper tubing is coiled at the back of the unit, it shouldn’t obscure any air flow to the front of the unit. The base on which the unit is installed needs to be flat and secure. If the unit is being mounted on a roof, it needs to be on wood so it can’t possibly be blown over the side in the event of very heavy wind.
Step 3 - Bending Copper Pipe
When undertaking an air conditioning installation, you shouldn’t use a pipe bender on the copper pipe. This is because units use ½ inch pipe and the bender would simply crush it. Instead, you need to cut the insulation and pull it apart to expose the pipe.
From here, the bending should be done very slowly and carefully. Since you need a wide radius with most units, this isn’t too difficult. Work outward from the centre, pressing firmly with your thumbs. Make sure none of the thumb indentations are more than 1 millimetre deep. Put the insulation back into place and secure it with waterproof tape.
Step 4 - Water Drain Pipe
With an indoor unit, the water drain pipe can be at either end of the drip tray. Simply make sure the rubber bung is in the hole at the other end.
When you install your water runoff, make sure it’s angled downward through the wall and runs a good distance from the house because the unit can put out approx 2,5 litres of water a day during the hottest part of the summer.
Step 5 - Pipe Connection
When connecting the pipes to the unit during an air conditioning installation, put a tiny drop of oil on all of the facings first. Then, attach the pipes to the brass cones and tighten with two wrenches. Be careful not to over tighten.
The copper pipes need to be covered with foam insulation and you should put foam over all the connecting parts. Make sure no refrigerant is leaking from any of the connectors when you start the unit. When expelling air from the unit, be certain you follow the timings in the manufacturer’s instructions!
Should you require a proffesional, HomeImprovement4u can get you in touch with the best in your area. Please see our homepage for more articles, services or contractors that may interest you.
Quick Links
Related Articles
Air Conditioning and South Africa
The summer heat in South Africa can be unbearable at times, so a good air conditioner is essential.
Read more
Airconditioning - Controlling your Enviroment
We are fortunate enough, as South Africans, to live in a country with a beautiful climate that shows us all ranges of what the seasons bring.
Read more