DIY Cement Screed Flooring: Step-by-Step Guide and Common Mistakes to Avoid

DIY Cement Screed Flooring: Step-by-Step Guide and Common Mistakes to Avoid
Are you ready to take on a home improvement project that will not only enhance the aesthetics of your space but also add value to your property? DIY cement screed flooring might be just the thing you need. In this comprehensive guide, we'll walk you through the step-by-step process of installing cement screed flooring in your South African home, while also highlighting common mistakes to avoid along the way.
Getting Started: Materials and Preparation
Before you dive into your DIY cement screed flooring project, it's essential to gather all the necessary materials and tools. You'll need cement, sand, water, a mixing bucket, a trowel, a spirit level, and primer. Ensure your subfloor is clean, dry, and free of any debris before proceeding.
Start by applying a coat of primer to the subfloor. This step is crucial as it helps the cement screed adhere better and ensures a smooth finish. Once the primer is dry, mix your cement and sand according to the manufacturer's instructions. Aim for a consistency similar to pancake batter – not too thick, but not too runny either.
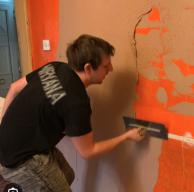
Now, pour the mixed cement screed onto the primed subfloor and spread it evenly using a trowel. Work in small sections to prevent the screed from drying out too quickly. Use a spirit level to ensure the surface is flat and even throughout. This is essential for achieving a professional-looking finish.
Finishing Touches and Common Mistakes to Avoid
Once the cement screed is applied, allow it to dry completely before proceeding with any further steps. This typically takes around 24 to 48 hours, depending on the climate and humidity levels in your area. Avoid walking on the screed during this time to prevent any damage or imperfections.
After the screed has dried, you can sand it down to achieve a smoother finish. Be sure to wear protective gear, such as a mask and goggles, during this step to avoid inhaling dust particles. Sanding is essential for removing any rough spots or uneven areas in the screed.
One common mistake to avoid when DIY-ing cement screed flooring is not properly mixing the cement and sand. Failure to achieve the correct consistency can result in an uneven or weak floor surface, which will affect the overall durability and longevity of the flooring.
Additionally, be mindful of the drying time and avoid walking on the screed before it's fully cured. Premature foot traffic can lead to cracks and imperfections in the finished floor, undoing all your hard work. Patience is key when it comes to DIY projects like this.
Lastly, don't forget to seal your newly installed cement screed flooring to protect it from stains and water damage. There are various sealants available on the market, so be sure to choose one that's suitable for your specific needs. Proper sealing will not only prolong the life of your flooring but also make it easier to clean and maintain in the long run.
With proper preparation, careful execution, and attention to detail, DIY cement screed flooring can be a rewarding home improvement project. By following this step-by-step guide and avoiding common mistakes, you'll achieve stunning results that will enhance the beauty and value of your South African home for years to come.

